Fritz!Box FAQ
Overview
So you have your new fritzbox and are now online with Wi-Manx. There may be some things you wish to change such as the Wireless password or name. or maybe you are a gamer and want to set up port forwarding?
This document includes some of the most frequently asked questions we get at Wi-Manx from our customers and aims to help aid you in achieving what you need from your FritzBox router.
Logging into the FritzBox control panel
To make any changes you first need to access the control panel. To do this:
- Using a device connected to your FritzBox (either wireless or wired) open a web browser and in the URL bar at the top type fritz.box
- You will be greeted with a login page where you will need to enter your password.
- If using a FritzBox 7590 or later (white models) the password for your router will be printed on the underside of the router. It will usually be a random word followed by a 4 digit number.
- If using an earlier model (red model) the password default is Password with a capital P.
You should now successfully be logged into your Fritzbox control panel and can begin exploring and making changes.
Changing the Wireless Name
As standard your Wireless network will default to the name and model of the Fritzbox. Credentials for your wireless network will be printed on the underside of the router but also in a pamphlet that comes within the Fritz Box packaging.
To change the SSID (wireless name) of your router follow the below steps.
Log in to your fritzbox user interface using the steps above.
Once within the interface you will be presented with a page that looks like the below. (note this was taken from a router with no configuration intact so your router will look slightly different on the landing page)
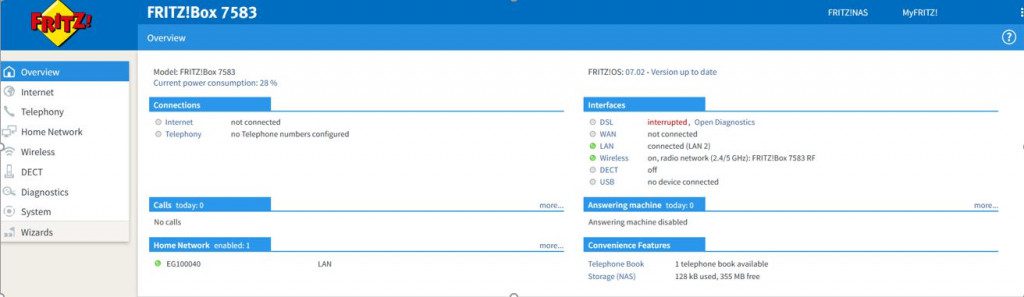
Now that you are on the web interface from the left hand panel click “Wireless” this will open another menu below where you can click “Radio Network” clicking this will show you the below screen. Where the “name of the wireless radio network” appears simply delete the current name and replace with your own. From here you can click apply
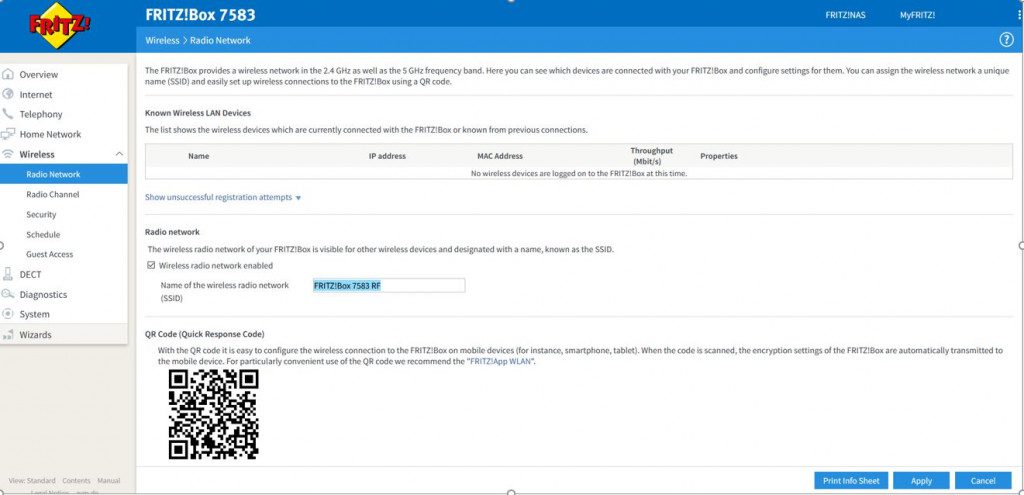
Click apply which will bring a pop up window up showing your new configuration. This can be printed however it is likely you will want to change your password also so this menu can just be closed as we will get to that later
NOTE: If you were connected to the web interface using WiFi the changing of the name will have now kicked you off the router. This is no problem simply find your newly names wireless signal and connect using the current password (on back of router)
Changing Wireless Password
Now we can change the wireless password.
To do so log back into your Fritzbox interface and follow these steps:
Click “Wireless” as before but this time click the options called “Security”.
From the menu shown below delete the “Network Key” text and replace with the password of your choice.
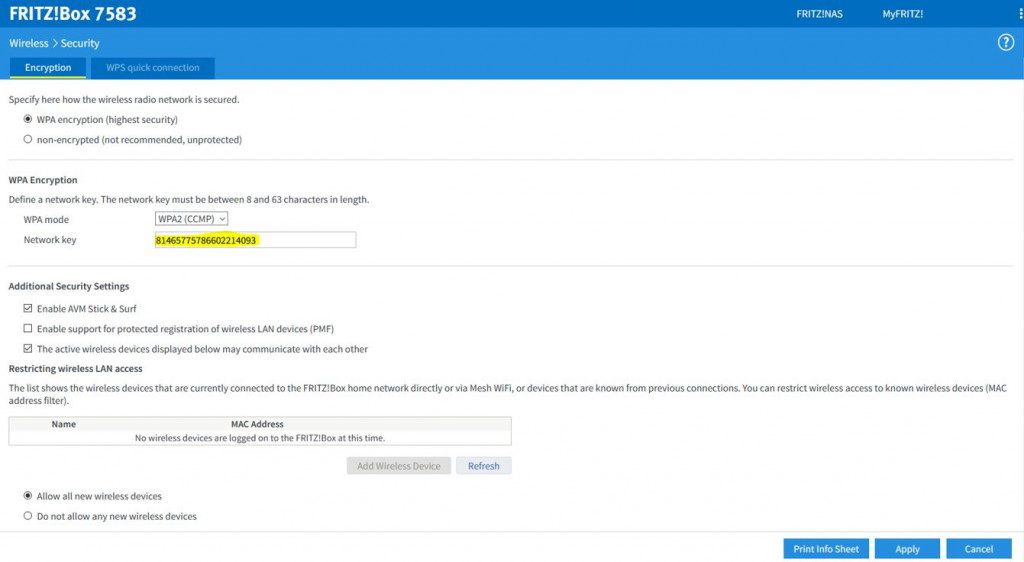
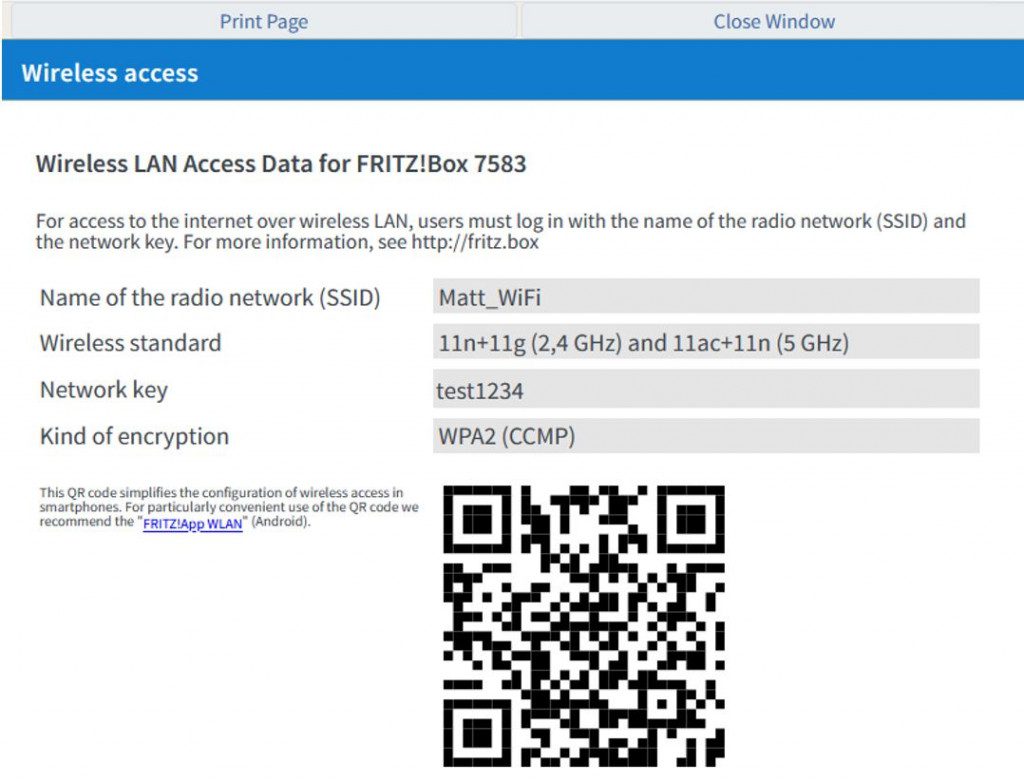
Now click Apply which will generate the printable pop up containing your new Wireless network details.
NOTE: Again if you have made these changes whilst connected to the router via WiFi you will need to reconnect to the network using the new SSID and Wireless Password created.
Upgrading your Firmware.
In many cases upgrading firmware on the router can correct minor issues with the Fritzbox. Firmware upgrades can include important patches or upgrades to the equipment to allow it to support new technologies introduced by the manufacturer.
To check if your box has an upgrade available and apply the update please follow the below steps.
Login to the fritzbox user interface.
From the left hand panel select the “System” option followed by “update” as shown below
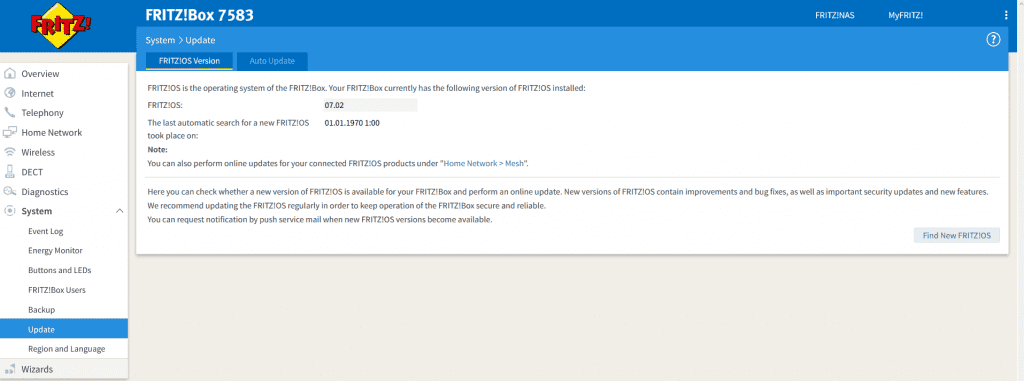
Now click the “Find New FRITZ!OS” button.
This will take you to a screen that checks for new updates. If a new update is found the screen will display the current version you are on and the new version available below it. To apply the update simply click the button to begin the upgrade.
NOTE: Your FritzBox will restart during this process so internet connectivity will drop briefly whilst the upgrade is completed.
Parental Controls
You can set up access profiles in the FRITZ!Box for all of the devices in the home network to define in detail how long and when internet use is allowed on individual days of the week. In addition, you can block access to certain websites or only allow access to certain websites.
General access profiles are already per-configured in the FRITZ!Box for this purpose:
- Standard: All of the devices in the home network use this profile by default and it is automatically assigned to all new devices in the home network.
- Blocked: Devices that use this profile can never access the internet.
- Unrestricted: Devices that use this profile can always access the internet without restrictions.
- Guest: This profile applies to all devices in the guest network and can be changed to suit your needs.
You can create your own access profiles for users or user groups whose internet use you want to regulate individually.
Each access profile can be assigned to one or more devices, thus ensuring that a child’s smartphone, computer, and game console are subject to the same restrictions and shared time budget
Creating an Access Profile
Create your own access profiles for all users or user groups whose internet use you want to regulate individually:
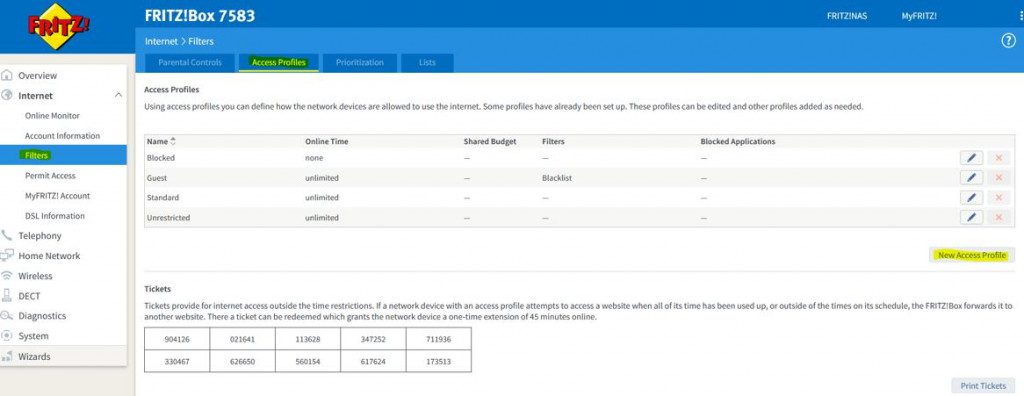
Click “Internet” in the FRITZ!Box user interface.
Click “Filters” in the “Internet” menu.
Click on the “Access Profiles” tab and then the “New Access Profile” button. (as shown below)
In the “Name” field, enter the name of the user or user group you want to regulate internet use for.
In the “Period” window, specify the times when internet use should be allowed.
In the “Time Budget” window, specify how long the internet can be used on the individual days of the week. Time budgets are not suitable for use with messengers such as WhatsApp because they access the internet all the time.
If you set up a time budget and want all of the devices with this access profile to share the available time, enable the option “shared budget”.
Enable the option “Use of guest access blocked”.
If you want to limit access to websites:
- Enable the option “Filter websites”.
- If you only want to allow access to certain websites, enable the option “Permit websites”.
If you want to block certain websites, enable the option “Block websites”. You can create your own filter list
Click “OK” to save the access profile.
Blocking devices or assigning them to an access profile
Block the devices that are not allowed to access the internet or assign a suitable access profile to the devices in the home network:
Click “Internet” in the FRITZ!Box user interface.
Click “Filters” in the “Internet” menu.
Click “Block” for all of the devices that may not access the internet.
Select the desired access profile for all of the device that have unrestricted or only restricted access to the internet:
Click “Change Access Profiles”.
If the device should have unrestricted internet access, select the “Unrestricted” access profile from the drop-down list.
If you want to limit internet access for the device, select one of the access profiles you created from the drop-down list.
Click “Apply” to save the settings.
Creating filter lists for websites
The FRITZ!Box parental controls not only allow you to limit internet access time, you can also use filter lists to block access to certain websites or only allow users to open certain websites.
Note the following information on the FRITZ!Box’s filter lists and proceed as described in the subsequent measures.
Requirements / Restrictions
Filter lists are not available if the FRITZ!Box uses the internet connection of another router. In this case, regulate internet use in the other router.
Direct IP access to websites is always blocked for access profiles for which a filter list is enabled. In the list of “Permitted IP addresses” you can see which IP addresses the FRITZ!Box blocked and also unblock them again if necessary.
The FRITZ!Box’s filter lists
The FRITZ!Box allows you to create a list of permitted websites and a list of blocked websites. Each list can contain up to 500 web addresses (URLs) and be enabled for one or several access profiles.
Permitted websites
Devices assigned to a profile for which the filter “Permit websites” is enabled can only open the websites on the list “Permitted websites”. All other websites are blocked. A list with permitted websites is suitable for small children who are only allowed to access a few websites.
Some web pages load content from other web addresses. If the filter “Permit websites” is enabled, these websites are only displayed correctly if the websites from which content is loaded are also on the list “Permitted websites”.
Blocked websites
Devices assigned to a profile for which the filter “Block websites” is enabled cannot open the websites entered in the list “Blocked websites”. All other websites can be opened. A list of blocked websites is suitable for children who are not allowed to access certain websites.
Some web services are available through different web addresses. To block access to these services, you must block all addresses that can be used to access it. This is especially the case with apps that often use several or different addresses.
Creating filter lists for websites
Enter the addresses of the websites whose access you want to block or allow in the respective filter list:
Click “Internet” in the FRITZ!Box user interface.
Click “Filters” in the “Internet” menu.
Click on the “Lists” tab.
Click the “Edit” link next to the list you want to edit.
Enter the web addresses (URLs) in the field without prefixes such as http, https, or www. Press the space bar after entering each address.
Example:
poker.com xxx.com aggro.tv
Click “Apply” to save the list.
Now the filter lists are set up. The filter lists apply to all access profiles for which you enabled the option “Filter websites” and selected the respective filter list. Restart the FRITZ!Box so that the filter list also applies to devices that accessed the internet while you were configuring it.