Yealink Manual Provisioning
Overview
Your Elite Voice solution allows you access to your domains administrator portal where you can make changes, administer and monitor you solution.
This guide covers manually provisioning a Yealink desk phone to an extension within your Elite Voice Solution.
Accessing your Elite Voice Admin Portal
To access your user portal browse to URL provided in your welcome pack. This should resemble https://YOURDOMAINHERE.sip.wimanx.com
You will be directed to a login page where you can enter your credentials provided in your welcome pack. If you do not know your username or password please email support@elitegroup.im ot call us on 01624 641177 for assistance.
Configuring your extension
To manually provision your extension to a handset you will need to know your extensions SIP password. In many cases these passwords have been set securely by the system and cannot be viewed. In this scenario where you do not know your SIP password you will need to change this within your extension setting on the Elite Voice portal.
To do so follow the instructions given below.
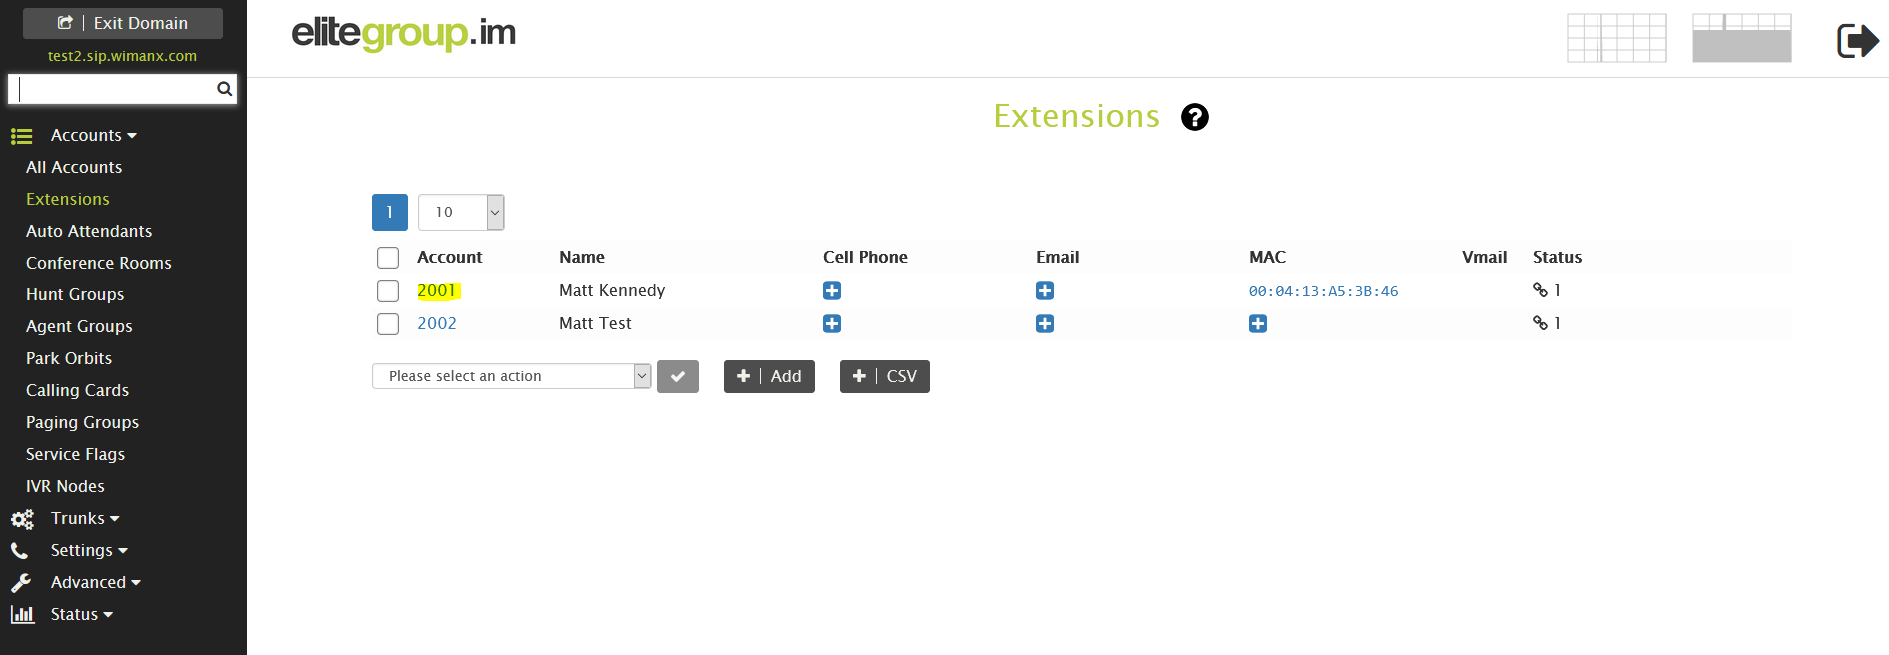
- From the main page select the accounts drop down.
- Select extensions from the list as shown below.
- Select the account/Extension you wish to configure for registration by clicking the extension number as also highlighted below.
Once into the Extensions details you will be defaulted to the general setup page which is where we need to be. From here follow the below steps
- Scroll down to “Account Profile” Section
- Locate “SIP Password” Field
- Type your new password in the field and again in the “Sip Password” (repeat) field*
- Once both fields are populated scroll down and click “save”
*Please note for security purposes the Elite voice platform is configured to only accept High Security Passwords. If the password is deemed weak a red X will appear next to the field to indicate it needs to be more complex/secure
Configuring your Yealink
To configure your Yealink handset you will need to ensure the below requirements are met:
- The handset is connected to the same network as your PC/laptop
- You know the IP address assigned to the handset*
- You know the admin credentials to access the handset**
*You can find the IP address of the handset b pressing the enter button on the phone.
**If your handset has been factory reset the standard Yealink username and password can be used.
Once you know the above information you can continue setting up your handset by following the below.
- Open a web browser
- In the URL bar enter the IP address of your handset and press enter
- login using the admin credentials
- From the main page select the account tab (shown below)
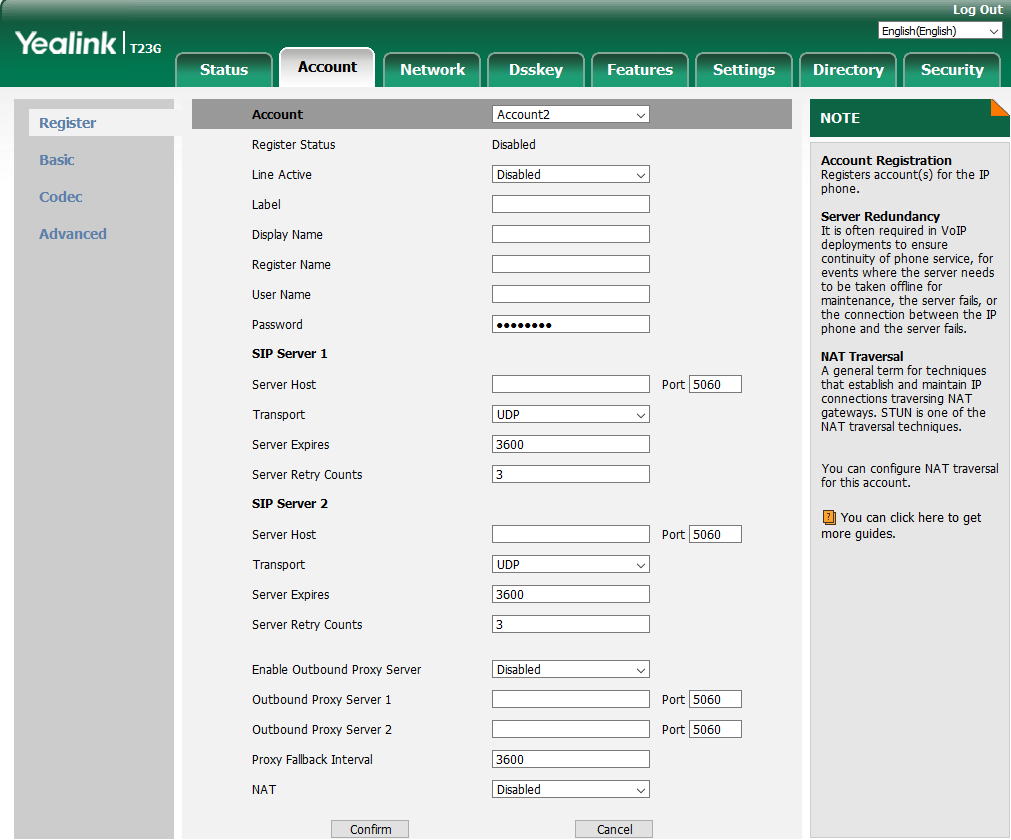
Now you are on the screen where configuration is entered follow the below instructions to configure your extension.
- Account – Drop down box (select account 1)
- Line active – Drop down box (select Enabled)
- Label – Leave Blank
- Display Name – Users name
- Register name – Extension Number
- User Name – Extension Number
- Password – Password previously set as SIP password
- SIP Server 1 – Server Host – YOURDOMAIN.sip.wimanx.com
- Transport – UDP
- Server Expires – 3600
- Server Retry Counts – 3
Leave the Sip Server 2 field blank. No further information is required on this page.
Once all of the above has been entered simply click confirm to register your phone to the PBX.
The portal for the phone will now apply the settings to the phone and you should see an indication that the phone has successfully registered to the extension as per below screenshot.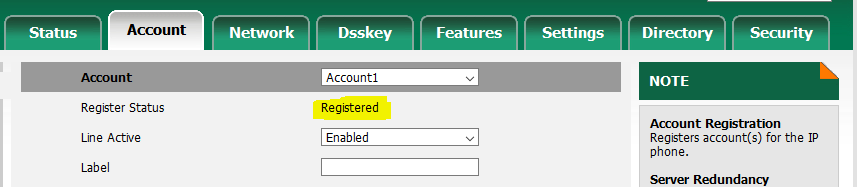
Repeat the process for each extension on each individual handset.